Visual Studio 2005 - 2008
Compatible with SpiraTest, SpiraTeam, SpiraPlan
This section outlines how to use SpiraTest, SpiraPlan or SpiraTeam (hereafter referred to as Spira) in conjunction with the Visual Studio (VS) integrated development environment (IDE) for viewing Requirements, completing Tasks and fixing Incidents.
The Add-In will operate in Visual Studio 2005 and 2008 but does require that the .NET framework version 3.5 SP1 is installed. It is normally installed with Visual Studio 2008 SP1 and Visual Studio 2010, but can be separately installed on a system with Visual Studio 2005 by downloading the installation file from Microsoft
Visual Studio Express versions cannot support Add-Ins, you must at least have the standard version of the IDE for the Add-In to appear in the menu bar. 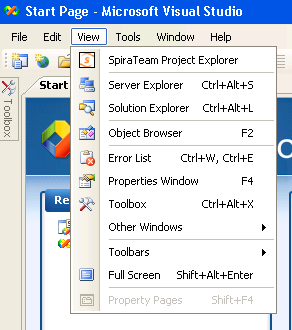
Installing the Visual Studio Add-In
Download and execute the Add-In installation file from the Inflectra website. The add-in will be automatically added to VS's menu bar.
Adding and Assigning Spira Projects
To view the Project Explorer, select "Spira Project Explorer" from the View menu. The tool window will open, and can be docked with any existing tool windows. When a solution is loaded that hasn't had any Spira projects assigned to it -- or if no solution is open -- the dialog will report so. If you have already assigned Spira projects to the open solution, they will each be loaded in a tree format in the tool window.
Visual Studio will remember the docking and location of the window, so that if you close it you can re-open it by selecting the menu option a second time. The window will re-open in the last position before it was closed.
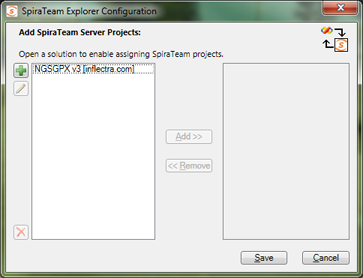
Once the Project Explorer is open, click the "Configuration" button ( ) in the Project Explorer's toolbar to open the Spira project dialog. Note that if you have no solution open, you can add, remove, and edit Spira projects, but you can only assign them to a solution when that solution is open:
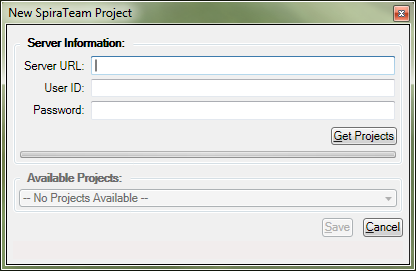
Click the New button to link to a new Spira project. The "new Spira Project" dialog will open. In the fields, enter in the following:
 )
)
- Server URL: The root address of your Spira installation. For example:
https://server1/Spira/Do not put "login.aspx" or any other page address in this field. - User ID: Your user ID you use to log into the Spira application.
- Password: Your password you use to log into the Spira application.
Once entered, click the "Get Projects" button. The add-in will connect to the server and get a list of projects that you are assigned to. Select the Spira project that you want to add, and click the "Save" button. Your project will appear in the dialog in the format of "Project Name [Server]". With a project selected in the left box, you can also Edit ( ) and Delete (
 ) the project.
With a solution loaded, you can select any number of Spira projects and assign them to the open Solution, by highlighting them, and clicking the "Add >" button. All projects assigned to the open solution will appear in the right side.
Clicking "Save" will return you to the IDE, and if you made any changes in the configuration, the Project Explorer will refresh and update its display.
Viewing Spira Project Artifacts
Task are compatible with SpiraTeam, SpiraPlan
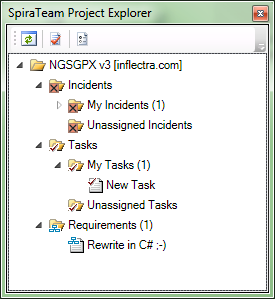
Once a solution is opened and there is a Spira project assigned, you can view the project's contents. At this time, the add-in will display the following items:


Incidents: Assigned to you, unassigned.


Tasks: Assigned to you, unassigned.


Requirements: Assigned to you.
By default, the Project Explorer will not show closed and completed items. However, by clicking the 'View Closed'
( ) button in the toolbar, the Project Explorer will be updated to show closed and completed items as well.
Double-clicking on a node (or clicking on the item's arrow) will open that item up and show all the sub-items.
Clicking the Refresh ( ) button on the toolbar will refresh the Spira projects in the Project Explorer. Double-clicking an artifact will open its details in the main tabbed document area for viewing and editing.
Viewing Artifact Details
Task are compatible with SpiraTeam, SpiraPlan
By double-clicking an artifact in the Project Explorer, you can open the details for the item in the main tabbed-document view. All the details screens are very similar, here is the Incident Details view for reference:
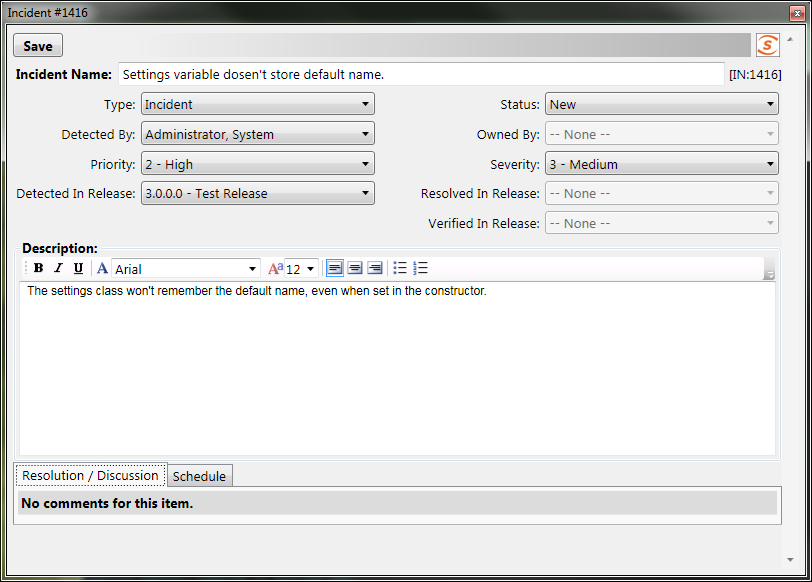
The top of the window has the "Save" button, and any informational or warning messages will appear to the right of the Save button. The rest of the window has detail fields relating to the item, and depending on the current workflow, some fields may be required or disabled. (Note that at this time, Requirements are read-only.)
Once you make changes to the artifact, changes are saved to the server when the "Save" button is clicked.
Note that due to platform architecture differences, the HTML description may not appear and save exactly as entered, and there is no 'Source HTML' view. If visual integrity/layout is important, then we recommend editing the description and resolution fields in Spira's Web user interface instead.
Data Concurrency Warnings
When trying to save an artifact, you may get a warning at the top of the window stating that the item was modified by another user. This error is telling you that changes were made to the item after the data on your screen was pulled from the server.
When this happens, you may see some fields highlighted in yellow or red. The colors represent data collisions:
- Yellow -- Any field highlighted yellow is a field that you tried to change that wasn't changed by the other user.
- Red -- Any field highlighted in red is a field that both you and the other user tried to change.
- No Highlight -- Fields without a highlight were possibly changed by the other user, but you did not make any changes to those fields.
When a concurrency issue occurs, the new data is loaded from the server, losing your changes due to possible workflow collisions. Simply review the changed data and make your changes accordingly.
Troubleshooting
The add-in is designed to capture all errors so that when something unexpected happens, work isn't lost. In most situations where an error occurs, a notification will be displayed of the error. In the Project Explorer, hover the mouse over the error node to get a full description of the error. Errors will also be logged to the desktop's Application Event Log.
A common symptom of an internal error is a blank or empty Details screen -- if this occurs when opening an artifact, save all your open work and restart Visual Studio. Contact support with the Application Event Log and inform them of the issue.