Login Providers
For more information about using login providers see the admin guide
Please Note
We have tried to give up to date and accurate information, but many providers do not themselves have correct information on their site. Hopefully they do not change things too much, but if they do and you cannot figure out what to do please contact our support team.
The "Client Secret" field is very sensitive so do not share it. Once you enter it in Spira you will not be able to access it again. Store it somewhere safely, like a password manager, if required.
EntraID (formerly Azure AD)
To set up an EntraID provider app with Spira you will need an EntraID (formerly Azure AD) account with EntraID set up with users as needed. For the steps below we have assumed EntraID is set up in relatively standard way.
First, you need to set up the app registration, this app will give your users a specific connection to Spira. When creating an app registration you should:
- Go to EntraID
- Click "App Registrations" from the sidebar on the left, then "New Registration" from the top of the page
- Enter a meaningful name
- Select which type of accounts to support. There are 4 options (as of March 2026). Pick the one that makes sense for your organization.
- Enter a Redirect URI of type Web:
- this should be the full URL as shown at the bottom of the EntraID provider page (https://MYINSTANCEURL.spiraservice.net/oauth) in Spira and must be HTTPS.
- Note: EntraID lets you add many redirect URIs but in our testing only the one we entered the very first time seemed to work - hopefully you will have better luck than us
- Once the app registration has been completed you will be taken to the App Registration Overview screen for this app.
- You will need to enter the "Application (Client) ID" into Spira as your Client ID
- By default, the permissions of the app include Microsoft Graph > User.Read. This is the only required permission by Spira
- To generate the secret key for Spira go to "Certificates and Secrets" and create a "New Client Secret"
- Give it a name
- Set an expiry period
- Make sure to copy and safely store the generated secret as once it is created you will not be able to retrieve it again
- To enter the provider information into Spira you will need 3 URLs. Go to the app registration overview page and click "Endpoints" to see all the possible URLs.
- Authorization URL = "OAuth 2.0 authorization endpoint (v2)" url
- Token URL = "OAuth 2.0 token endpoint (v2)" url
- Profile URL = https://graph.microsoft.com/oidc/userinfo
Github
- Create a new application in Github
- Fill in the required fields.
- Make sure to put the return URL exactly as it appears on the provider page in Spira into the "Authorization callback URL" field
- To later edit the application and change any setting:
- click on your profile in the top right at Github.com
- click
Settings - click
Developer Settings - click
Oauth Apps
Gitlab
- Login to Gitlab
- Click on your profile in the right at Gitlab.com
- Click
settingsfrom the dropdown - Click
Applicationsin the lefthand sidebar - Enter in the required information, including the return URL
- Make sure that required scopes have been selected The minimum required scopes to select should be: "read_user", "openid", "profile", and "email". You will need alll 4 selected for the integration to work
Google
- Follow these instructions from Google to set up Oauth 2.0 for a server-side web app (this is what Spira is)
- You should then get to a form to create the OAuth Client Id
- You do not need to add any APIs to this application
- Choose the "web application" radio button
- Make sure to set up the OAuth Consent Screen BEFORE creating the "Credentials". This has to use domains where the application lives and for business use these should not be set to public
- On the Credentials page make sure to use the same URLs for the Authorized Redirect URLs as you did on the OAuth Consent Screen
- You have to use URLs that point to actual domains - you cannot therefore use this for an internal only application or localhost
- Once the application has been created, you can restrict access to only users within your GSuite internal domain - to do so go back to the Google Oauth Consent Screen and click the "Make Internal" button
Microsoft ADFS
This guide assumes you already have an accessible ADFS (2016+) server, configured with users as required.
First, create the application group
- Login to your ADFS server
- In the ADFS Snap-In, right click on the folder in the sidebar "Application Groups" and click "Add Application Group..." from the menu to show the application group wizard
- Welcome screen
- Enter a name (this will be displayed to users on connecting to Spira)
- Select "Server application accessing a web API" from the list of Templates in the wizard
- Sever application screen
- You will see your Client ID. You can get this later but it is easier to copy it now as you need to enter this into Spira
- Add the Redirect URI(s) for Spira. You should copy this from the provider details page and make sure it is exactly as on that page
- Configure application credentials screen
- There are three options on this screen. Check the "Generate a shared secret" option.
- Copy the secret created so you can enter it later into Spira
- Configure Web API screen
- For the "Identifier" add the root url(s) of your Spira application. For instance, if your redirect url is "https://mysite.spiraservice.net/oauth" add "https://mysite.spiraservice.net" here
- Apply Access Control Policy screen
- Determine the appropriate policy here based off your company security policy.
- Configure Application Permissions screen
- For "Permitted Scopes" make sure that "openid" is checked. This should be checked by default
- You should now be able to successfully complete the creation of the application group, and have saved its Client ID and Secret
Now, you need to get the specific URLs so Spira knows how to connect to your ADFS. You will need your server's base URL, to which you add the specific endpoints
- In the ADFS Snap-In click on the "Endpoints" folder in the sidebar. This will show you a large list of endpoints
- For the Authorization URL and the Token URL:
- look in the "Token Issuance" section of the list for an endpoint of type "OAuth"
- make sure this endpoint is enabled
- Authorization URL = add this to the end of your server base URL and add "/authorize"
- Token URL = add this to the end of your server base URL and add "/token"
- For the Profile URL:
- look in the "Open ID Connect" section of the list for an endpoint of type "OpenID Connect UserInfo".
- make sure this endpoint is enabled
- Profile URL = add this to the end of your server base
By default your urls will look like:
- Authorization URL =
{server base URL}/adfs/oauth2/authorize - Token URL =
{server base URL}/adfs/oauth2/token - Profile URL =
{server base URL}/adfs/userinfo
Okta
First you need to create the application in Okta
- Login to Okta.com with your admin account
- Go to "Applications" from the main navigation
- Click "Add Application"
- Choose "Web... .NET, Java, Etc" from the next page and click "Next"
- Make sure you use the base domain only in the Base URI field
- Provide the following permission: "Client acting on behalf of a user" > "Authorization Code". This should be the only permission selected by default
- Hit Done
- You can now specify which users or groups have access to this application through the Okta UI
Next, you need to get the necessary urls for connecting to Spira. You will need several urls specific to your Okta domain.
The authServerId will need to be configured based on your Okta setup. You can find more information about testing the server here: https://developer.okta.com/docs/guides/customize-authz-server/test-authz-server/
Broadly, the urls may take the following shape (discuss with Okta if you run into any issues with these)
- Authorization URL: https://{yourOktaDomain}/oauth2//v1/authorize
- Token URL: https://{yourOktaDomain}/oauth2//v1/token
- Profile URL: https://{yourOktaDomain}/oauth2//v1/userinfo
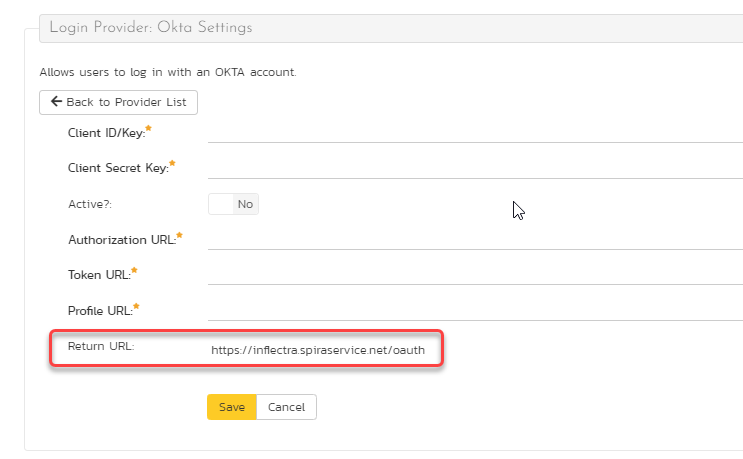
The Redirect URI (or return URL) can be found at the bottom of the Okta administration page in Spira.
OneLogin
First create the application in OneLogin
- Login to your OneLogin admin account
- Go to "Applications" from the main navigation
- Click the "Add App" button
- Search for "OpenId" in the list of applications and click the result "OpenId Connect (OIDC)
-
Fill in the basic information about the new app:
- INFO: A unique name (e.g. SpiraPlan) and any description you like
- CONFIGURATION:
- Login URL: add the root url of your Spira application. For instance, if your Return URL shown on the provider page in SpiraPlan administration is "https://mysite.spiraservice.net/oauth" enter "https://mysite.spiraservice.net" here
- Redirect URI: add the Return URL shown on the provider page in SpiraPlan administration - e.g. "https://mysite.spiraservice.net/oauth" (note that this will always end in "/oauth" - all lowercase)
- Post Logout Redirect URI: use the same URL as you did for "Login URL" above
- Click "Save"
-
Add existing users to the application to allow them to login to SpiraPlan using OneLogin via the "Users" tab
-
Next, you need to get the necessary information for connecting to Spira. You will need several urls specific to your OneLogin domain.
- While still editing / creating the application, go to the "SSO" tab
- "Client ID" on this tab should be used for the "Client Id/Key" field in SpiraPlan
- Click the "Show Client Secret" link to get the secret to use in the "Client Secret Key" field in SpiraPlan
-
Use the "Issuer URL" (which will end in something like "onelogin.com/oidc/2") as the base url in SpiraPlan as below:
- Authorization URL: {Issuer URL}/auth
- Token URL: {Issuer URL}/token
- Profile URL: {Issuer URL}/me
OpenId Connect
The generic OpenId providers accepts any standard compliant OAuth Provider. The required configuration will vary based on how each provider works. However, make sure that, as with other providers, that the return URI entered into the OpenId provider matches that inside SpiraPlan.