Jetbrains IDEs
Compatible with SpiraTest, SpiraTeam, SpiraPlan
This section outlines how to use SpiraTest, SpiraPlan or SpiraTeam (hereafter referred to as Spira) in conjunction with any Jetbrains integrated development environment (IDE) for viewing Requirements, Tasks and Incidents. Rather than develop a new user-interface from scratch, the Spira plug-in uses the robust tool window functionality in Jetbrains IDEs which allows users to customize their experience.
Installing the Jetbrains Plug-In
This section outlines how to install the Spira plug-in for Jetbrains. It assumes that you already have a working installation of SpiraTest, SpiraPlan or Spira v5.0 or later and an up-to-date version of your Jetbrains IDE. For this tutorial we will be installing the plug-in in IntelliJ, Jetbrains' Java IDE.
If you have an earlier version of Spira, you will need to upgrade to at least v5.0 before trying to integrate with Jetbrains.
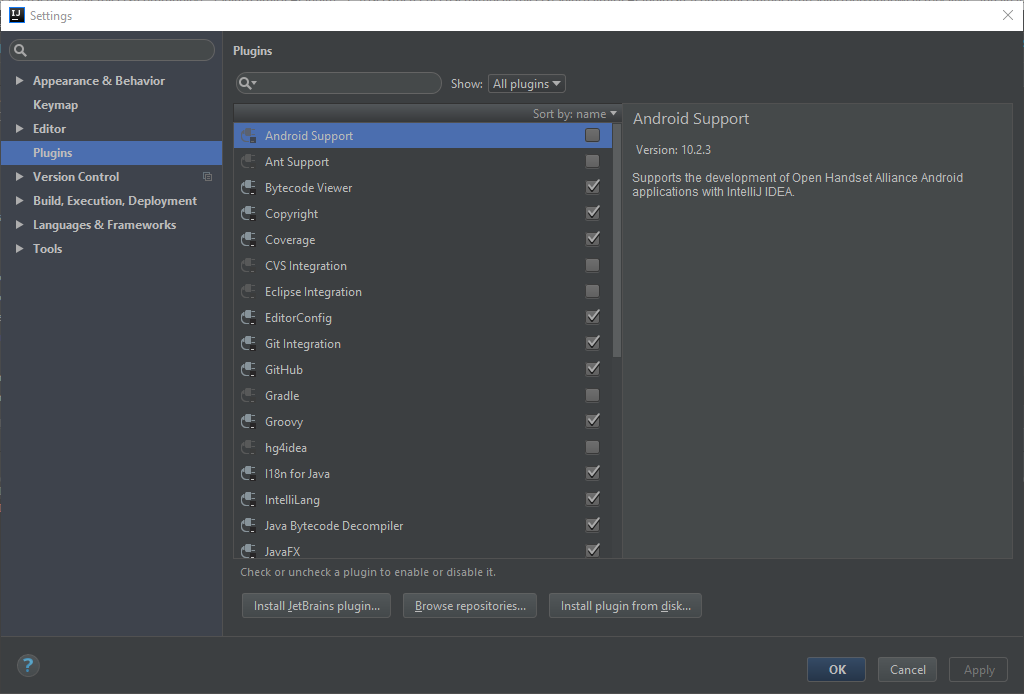
To obtain the Jetbrains plug-in, open up the Jetbrains settings dialog at File > Settings. This will open the settings dialog. Click on the "Plugins" section on the left. Your screen should look something like this:
Click on the "Browse repositories" button on the bottom of the screen, and enter "Spira" into the search bar. You should see the following result:
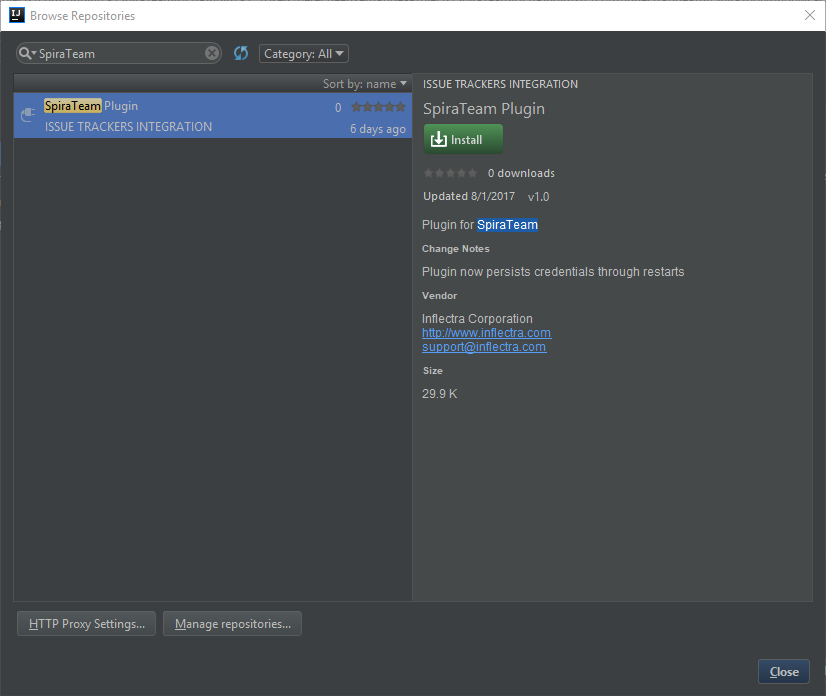
Click the Install button. After it has installed you will be asked to restart your IDE.
After your IDE has restarted, go to View > Tool Windows > Spira to open up the Spira Tool Window.
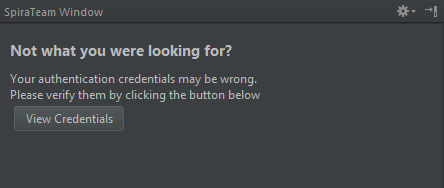
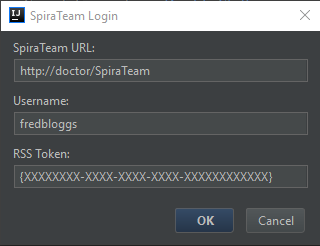
Click on the "View Credentials" button and put in your log-in credentials. Please note that you can obtain the RSS Token by going to your user profile inside Spira. If the RSS Token is blank, make sure to enable RSS, and click Save.
NOTE: this plugin lets users create artifacts in Spira, so please make sure that the user has create permissions for incidents and tasks to make full use of it.
Once you press the OK button, wait for the window to close. If your log-in information is correct, you should see the following screen in the Spira Tool Window:

Viewing Requirements, Tasks and Incidents in Jetbrains
Task are compatible with SpiraTeam, SpiraPlan
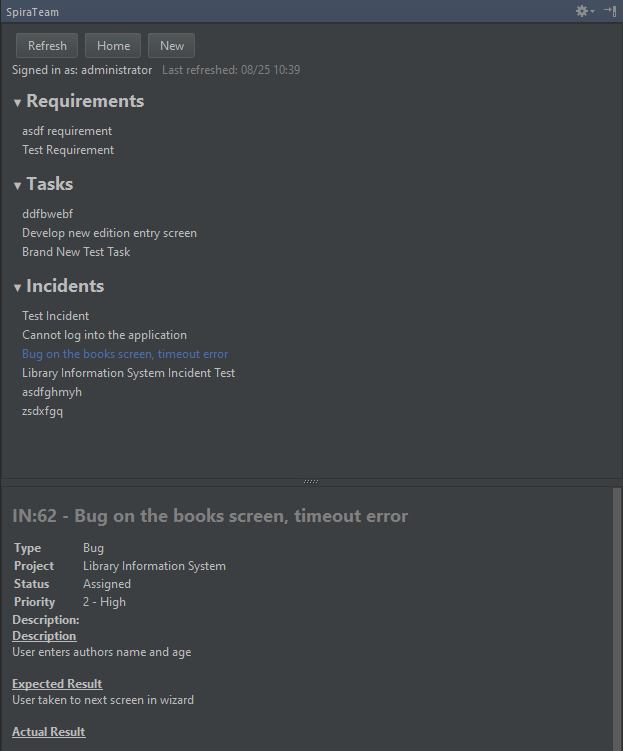
Clicking on Requirements, Tasks or Incidents will expand a list of their respective item's that are open and are assigned to you. If, for instance, you have no open requirements assigned to you, you will not see the "Requirements" title in the Spira window. Here is an example of all three expanded:

Clicking on any requirement, task or incident will open up additional information in the bottom of the tool window. Clicking the title in this additional information panel will open the relevant item in Spira in your default browser.
Creating new Requirements, Tasks, and Incidents in Jetbrains
Task are compatible with SpiraTeam, SpiraPlan
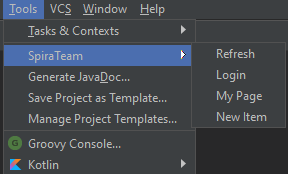
Clicking the "New" button at the top of the Spira window or navigating to Tools > Spira > New Item will bring up the new item popup.
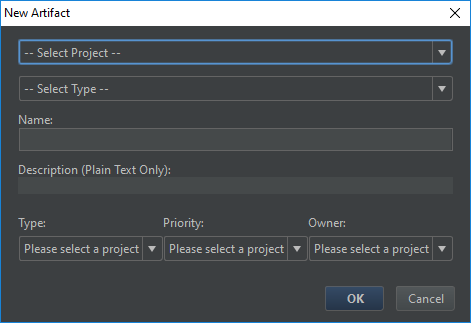
After you select your project and item type, the type, priority and owner fields will populate appropriately. If you do not wish to select a priority or owner, simply select "---None --" for either of them, and the field will not be populated in Spira.
Once you press OK, your artifact will be created and you will get a notification in the Spira Tool Window like this one:
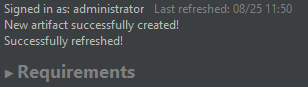
Clicking on the notification label will dismiss it.
Miscellaneous Functions
If you want to change the user you are signed in as, you simply need to click on your username on the right of the "Signed in as" label.
Clicking the "Refresh" button will refresh your assigned items from the server, while the "Home" button will take you to your My Page in your default browser. Navigating to Tools > Spira will bring up another way of interacting with Spira